This tutorial is only to get your feet wet in this huge field of real time game servers .
It is real simple and teach you how to make single action , that is
moving players on all clients in real time .
also there are parts which are not finished yet like GEM"S on screen , ignore them for now.
You can check the source code here :
https://github.com/meiry/Tutorial_mmo_websocket_game_server_c_libuv_libwebsockets_Cocos2d-x-HTML5
I'm quite aware of the huge hype using servers like Node.js for such tasks.or even Java Netty
Especially when choosing event based a sync single thread server .
Although they are great servers and they are proven to be robust they have bottlenecks. for example:
(Notice those are very high level claims based on my own almost 20 years of development experience ).
Node.js using V8 engine as its JavaScript interpreter which originally designed for the chrome browser. huge frameworks are written in pure JavaScript which this browser interpreter needs to chew.
Java Netty is using the java JVM which it is a Software that execute your java Software in memory or not still.The JVM do take extra server resources despite the JVM have its own fine tuning configurations the results on very high load are sometimes unexpected . and of course the GC.
Therefore I want to present option which is not so popular BUT it will probably utilize your physical server the most. and as result will save you money.
see games like Agar.io or slither.io their server build using c++ .
The tutorials are written to show you the basic usage of client/server connectivity , don't expect to see full blown game made . this is just a demo .
I will use the Authoritative server model and Client side prediction , to read more about it please
Please Refer to this great theoretical explanation about this model:
http://www.gabrielgambetta.com/fpm1.html
Written by Gabriel Gambetta .
The server and client is build on top and with the help of those great open source cross platform libraries:
- Libuv v1.90: this is the Node.js network library which abstracts the network event based model.
- libwebsockets v2.0: cross platform C web sockets library
- list, hashmap , array files from android-system-core : C helpers
- cJSON : fast c json writer/reader
- Cocos2d-x HTML5 : game engine.
The project is developed in windows using Visual Studio 2013 c++ for the server.
And Chrome browser for the client .
Latter on i will add Linux and Mac support all code is cross platform .
1. Libuv compilation.
Download libuv from the link below or git clone the master repository from here :
https://github.com/libuv/libuv
Then open the VS2013 x86 Native Tools Command Prompt which located in the visual studio 2013
Tools directory .
browse to the libuv root directory and execute the vcbuild.bat :

Then befor compiling go to Libuv -> right click -> properties -> C/C++ -> Code Generation
And chnage it to /MDd

Compile !
It create the libuv.lib file located in :
libuv\libuv-1.x\libuv-1.x\Debug\lib\libuv.lib
2. Libwebsockets compilation.
Download libwebsockets from the link below or git clone the master repository from here :
https://github.com/warmcat/libwebsockets
Open cmake gui and point to the libwebsockets root directory .
And to the build directory where cmake will create the VS build files.
Click the configure button to revile the Cmake variables we need to feel .
It will open popup window there chose Visual Studio 2013

After the first configuration interation it will popup error window this is becose there few things we need to configure so libwebsockets work with libuv.
In the main cmake gui where its all painted in red do as follow : set the proper values
LWS_WITH_LIBUV checked
LWS_WITH_STATIC checked
LWS_WITH_SSL un checked
LWS_LIB_INCLUDE_DIRS = d:\dev\cpp\gamedevcraft\libuv\libuv-1.x\libuv-1.x\include
LWS_LIBUV_LIBRARIES = d:\dev\cpp\gamedevcraft\libuv\libuv-1.x\libuv-1.x\Debug\lib\libuv.lib
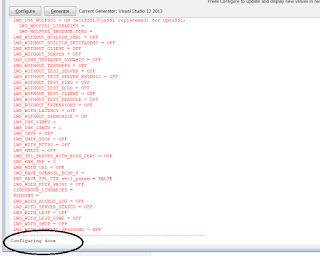
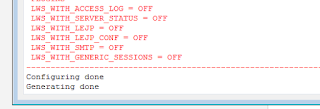
Now go to the build directory and load the libwebsockets.sln solution file into VS 2013.
We only need to compile websockets project . so compile it .
The product will be static libwebsokctes file : websockets_static.lib this is the file we are going to use together with libuv compiled statically to our main server application .
3.Creating the VS project for our server.
First Download the source code of the game server from this GitHub repository :
https://github.com/meiry/Tutorial_mmo_websocket_game_server_c_libuv_libwebsockets_Cocos2d-x-HTML5
These files are the logic of the game server .
In VS go to :
Open -> New Project ->Visual C++ -> Win32 Console Application ,
At the button in the same window give the project name :
I called it "libuv_libwebsocket_cocos2dx_server" , and set directory for the project.
Then press Ok .
In the Next window click the the Next button
In the third window Uncheck the "Precompiled header" and click "Finish".
Now that you created the project lets import the source files and configure the project .
Copy the files which downloaded from GitHub and copy them to the root of the new created project.
Create new directory called libs also in the root directory
Into the libs directory copy the libraries we compiled in the previous steps (1 & 2) :
libuv.lib , websockets_static.lib , zlib_internal.lib
sources :
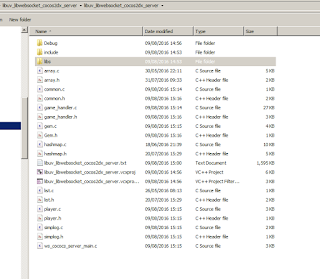
libs:
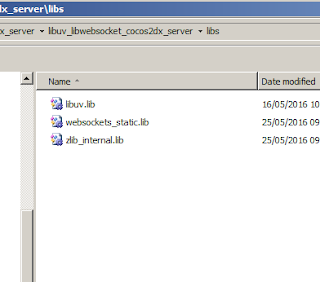
We now going to add all those libs + headers + sources files into our VS project .
Right click on the "Header Files" in the new created project in VS go to :
Add -> Existing item
Browse to the new created project root directory and select all the headers there
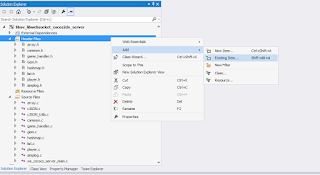
Do the same but now right click on the source directory in VS under the new project and add the C files :
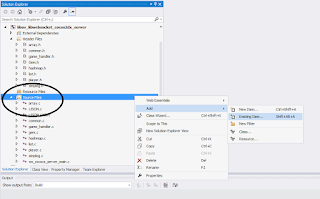
You need also include the cJSON c file , so repeat the same process for the files: cJSON_Utils.c cJSON.c
Project configuration :
Right click on the project go to :
include;include\uv;include\lws;include\lws\win32helpers\;include\cjson;
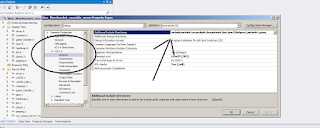
Then go to:
C/C++ -> Preprocessor -> Preprocessor definitions
Verify you have those set :
WIN32
_DEBUG
_WINDOWS
_CONSOLE
_LIB
_CRT_SECURE_NO_DEPRECATE
_CRT_NONSTDC_NO_DEPRECATE
Then go to:
C/C++ -> Code generation -> Runtime library
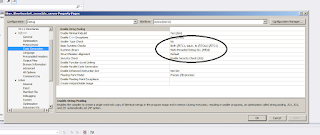
Then go to :
Linker -> General -> Additional Library Directories And add the libs directory we created in the previous step
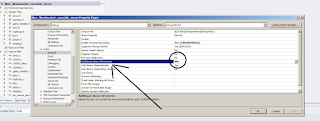
Then go to :
Linker -> Input -> additional dependencies
And verify you have those library names ( this part will be different in Linux configuration )
advapi32.lib
iphlpapi.lib
psapi.lib
userenv.lib
ws2_32.lib
libuv.lib
websockets_static.lib
zlib_internal.lib
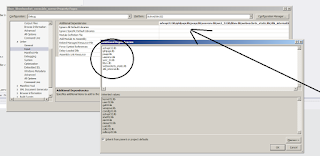
Then go to :
Linker ->SubSystem
verify it set to : Console (/SUBSYSTEM:CONSOLE)
That's all ! compile the project
You should see build\Debug\libuv_libwebsocket_cocos2dx_server.exe file create.
Go to PART 2 where we dive into the server source code


hey,I am new to cocos2dx . I am using cocos2dx - c++ v3 version ..can you tell me how to get real time multiplayer in cocos2dx c++ version??
ReplyDeleteyeah start with this tutorial (:
ReplyDeletenever heard before about libuv and libwebsockets have this method any more documents or community if i catch a problem during development!?and i want to know what is your opinion about SignarR ?! or microsoft WCF to develop server side of a turn based board game
ReplyDelete